Basic configuration example
Basic configuration of a course using the format Topic from menu
Programa Integración de Tecnologías a la Docencia
Universidad de Antioquia
In this tutorial, you will learn to make a basic configuration of a course using the format Topics from menu. This format allows you to display the topics of the course by a menu. For more information about all options that this format offers, consult the handbook in this link: Configuración del Formato Temas desde Menú.
To finish the basic configuration, the course will be displayed as the following figure shows:
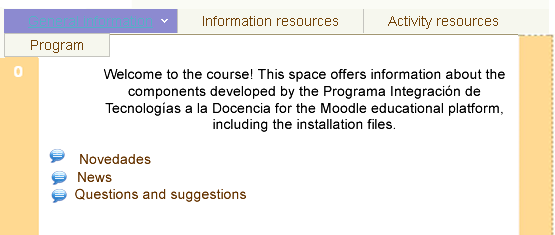
Figure 1. Course view
To configure a course with this type of format, you must go to the Administration block and click on Settings, as the following image shows:
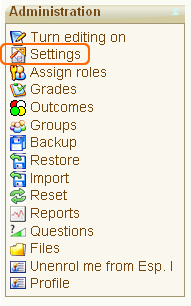
Figure 2. Administration
In the configuration form in the option Format choose Topics from menu, as it shows in the following image and to finish, save changes using the button at the end of the form.
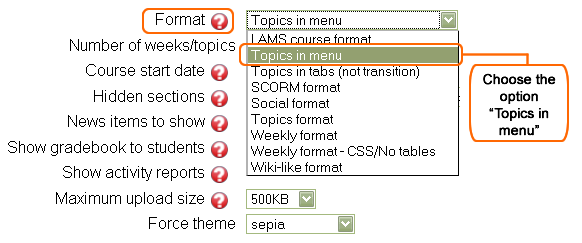
Figure 3. Format Topics from menu
To save changes, come back to the main page of the course and enable the edition.
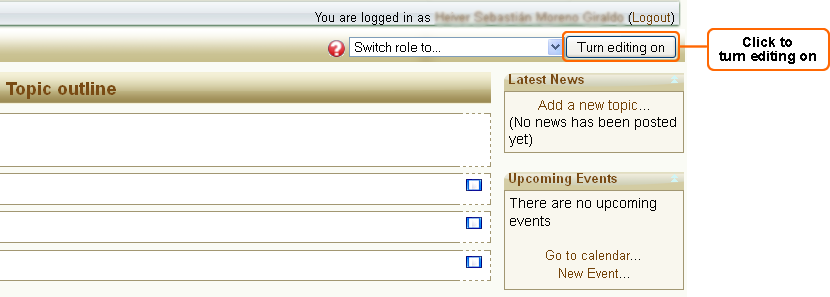
Figure 4. Turn editing on
To turn on the edition, you can see the icons that will allow you to edit your course, and to configure the menu of your course, click on Edit menu (See Figure 5), located at the top of the module 0.
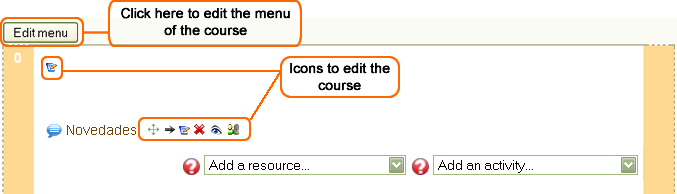
Figure 5. Click on Edit menu
To enter in the option Edit menu, you could see a set of tabs containing the different options to set the appearance and the menu content for the course. See Figure 6.

Figure 6. Configuration options
Start in the Configure tab, which has the following appearance:
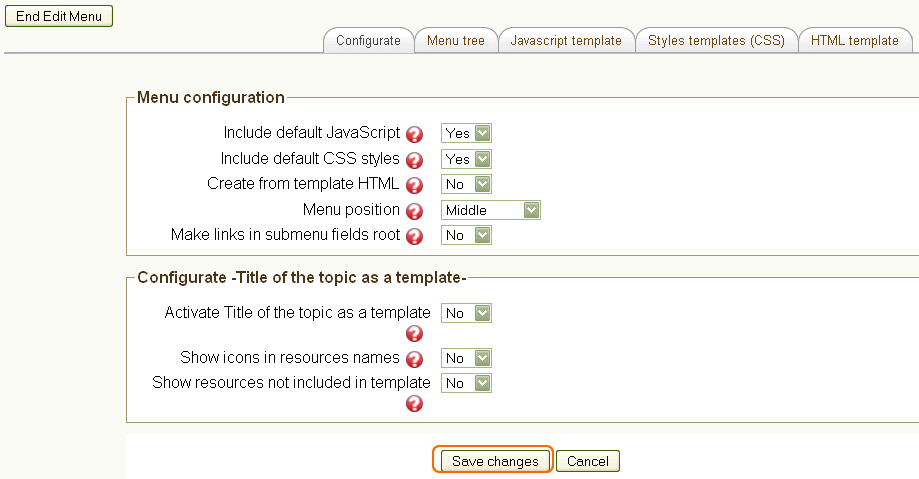
Figure 7. Configurate Tab
The option Include default JavaScript defines if the JavaScript functions that allow the menu to be popup are included. Choose the option Yes.
The option Include default CSS styles defines if the CSS styles for the menu are included. We suggest you select Yes.
For the option Create from HTML template, choose the option Not, because your menu will be floating, then will be configured from the Menu tree tab
The option Menu position defines the position in which the menu of the course will appear. Choose the option Middle.
For the option Keep links on submenu roots, choose the option Not, because in this configuration, the menu item will open the son links to click on it.
To end, click on the button Save changes.
When saving changes, the following message will be displayed: The information was successfully saved. This means that all changes were saved and you can continue with the next tab. For it, click on the Menu tree tab. See Figure 8.

Figure 8. Menu tree Tab
When you sign in for the first time in the topic tree, the platform suggests a lineal structure, without branches, with a quantity of sheets equal to the number of topics of the course, as the following figure shows.
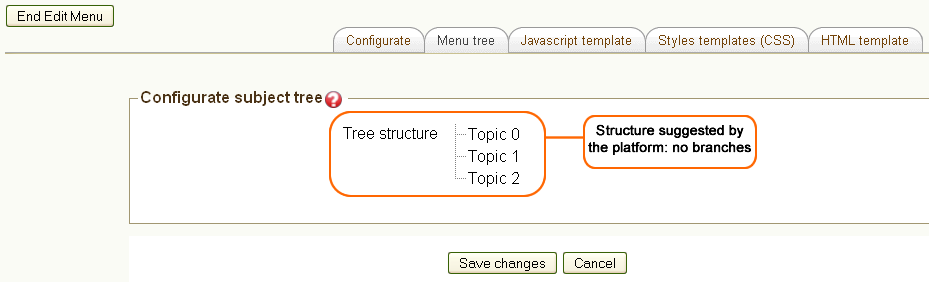
Figure 9. Structure without branches
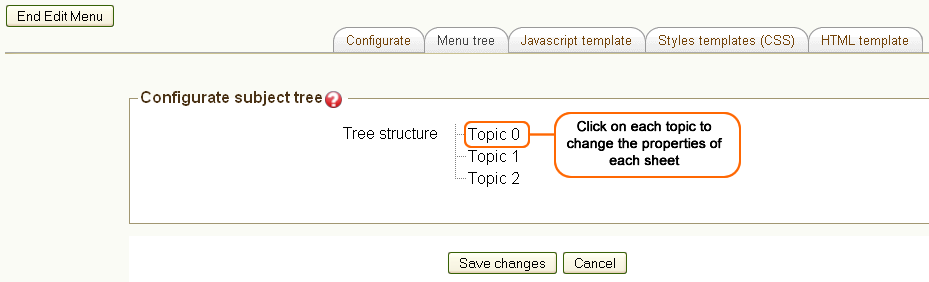
Figure 10. Click on each topic
In the option Sheet name you must write the name of the sheet. In this example, the sheet will be the module 0’ sheet, so it is named General information.
In the option Target topic, you must choose the module or topic where the sheet will be linked. If you select a topic, you could not define later an external URL to which direct the link of the option in the menu. In the example, the target topic is empty because this sheet is father or main sheet.
The option URL allows you to indicate an URL to which the menu option will do reference. It can be specified if a target topic was not selected, only.
The option Target of the link allows you to indicate if you want to open the link, either the topic or the external URL, in a new window or in the same window. If you do not select an option, the link will open in the same window. Leave this field empty for the link open in the same window.
Finally, click on the option Change sheet data to save all the values associated to the properties of the selected sheet.
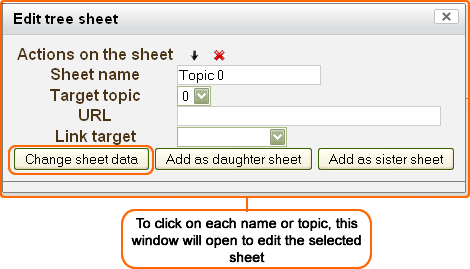
Figure 11. Ventana de edición de la hoja seleccionada
In the following window you can see a sheet in your menu tree, click on it to add a daughter sheet.
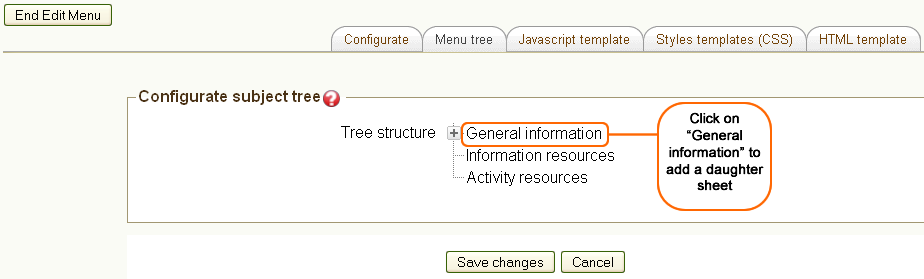
Figure 12. View of the sheet name
In the figure 13, you can see the following example:
In Sheet name write the name of the sheet that you will add. In this example, the name will be Programa.
In Target topic choose the topic where the sheet will be linked. In this example, the target topic will be '0'.
As you chose a target topic, do not use the URL option.
Leave the option Target of the link empty for the link is open in the same window.
Finally, click on the option Add as a daughter to save the values associated to the properties of the selected sheet.
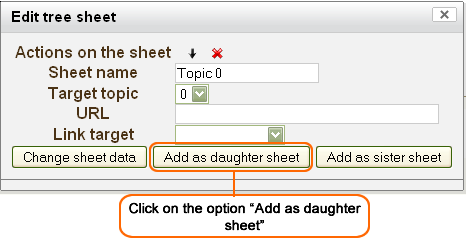
Figure 13. Edition window of the selected sheet
In the following figure, the sheet recently edited was left as a daughter sheet of the father or main sheet.
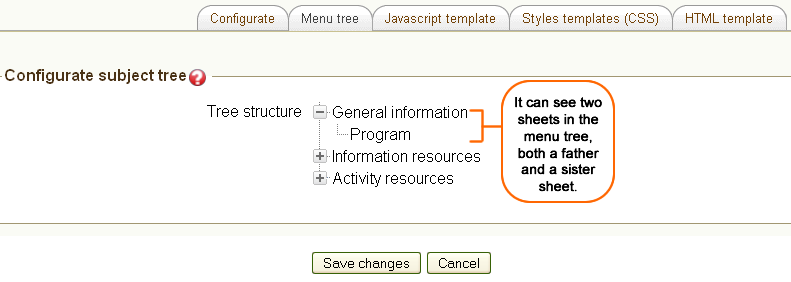
Figure 14. Menu tree structure
Continue with the process with each tree topic until finishing the structure of the menu tree, and at the end, you will see it equal or similar to the following example:
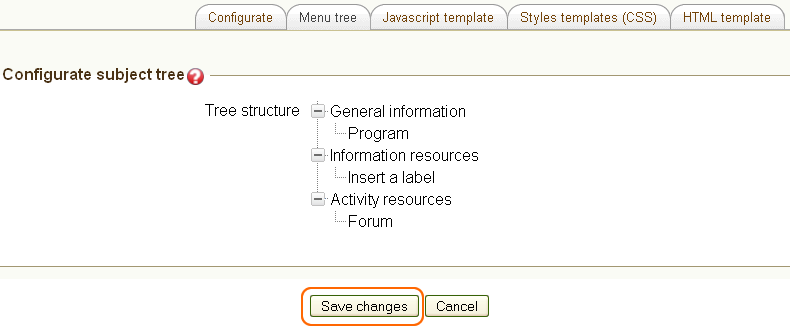
Figure 15. View of the tree structure
If you have to edit the sheets of the menu tree, you can use the actions of the edition window of each sheet. Each of them will be explained below:
|
|
Move a sheet to left: if you move a sheet to left, this is converted into sister of the container sheet (parent sheet). This option is only available if the sheet is son of another sheet, never whether it is in the main branch. |
|
|
Move a sheet to right: If you move a sheet to right, this is converted into the son of the previous sheet. This option is not available for the first sheet of the main branch. |
|
|
Up a sheet: if you up a sheet, it changes the order of a sheet, placing it before its brother immediately previous. This option is not available for the first sheet of a branch. |
|
|
Down a sheet: if you down a sheet, it changes the order of a sheet, placing it after its brother immediately later. This option is not available for the last sheet of a branch. |
|
|
Delete a sheet: This option allows you to delete the selected sheet and all the sheets that it contains. |
Table 16. Options of the edition window
Once you have finished the tree, you must click on Save changes. The tree changes are temporary, if they are not saved and another tab is selected or the page is closed, all changes will be missed.
Pass to the CSS styles template tab. See figure 17.

Figure 17. CSS Styles template
A simple example of using the styles template is writing the following code in the window CSS code: See figure 19.
With the last code, you can add a different background color to each root sheet of your menu (see table 18). If you want to change the background color of the menu’s root sheet, go to background color, and here change the color number. As you can see in the example, the color for the first root sheet of the menu is #87B9E0.
To give a better appearance to the root sheets of the menu, in the example we put the letter in white color, if you want to change this color, go to color, then change the color number to the letter. As you can see in the example, the letter color is #ffffff.
Table 18. CSS Styles code
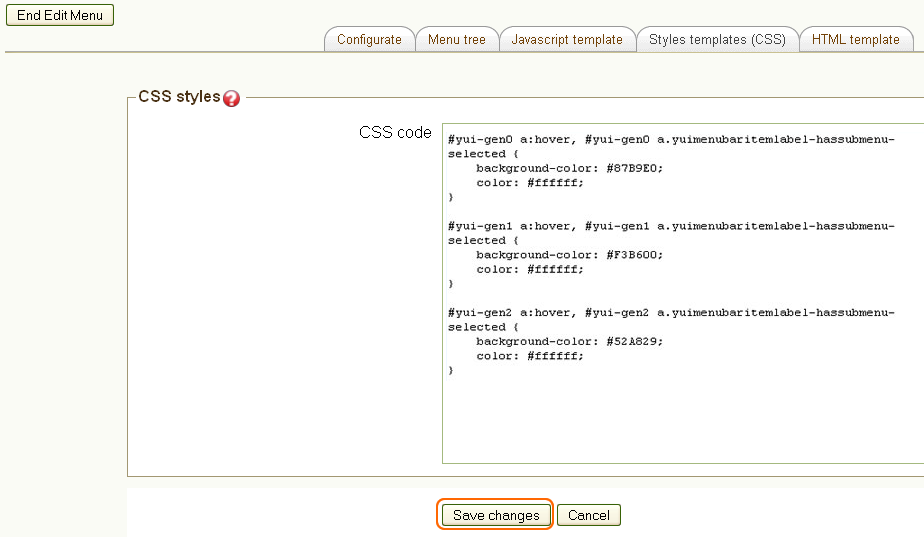
Figure 19. CSS Styles template
To finish, click on Save changes and on End edit menu. See figure 20.
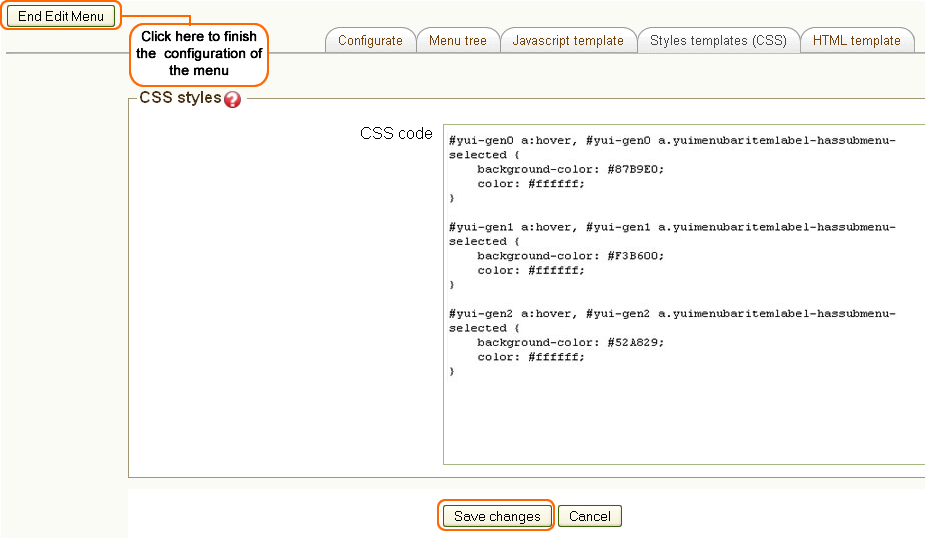
Figure 20. End Edit menu
Disable the edition of the course and when you open each of the topics you will see they have a different color:
In the figure 21, the topic is displayed with a blue color.
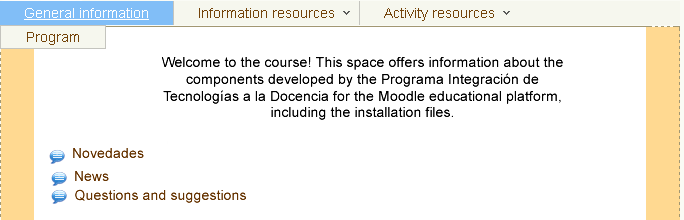
Figure 21. View of the menu
In the figure 22, the topic is displayed with a yellow color.
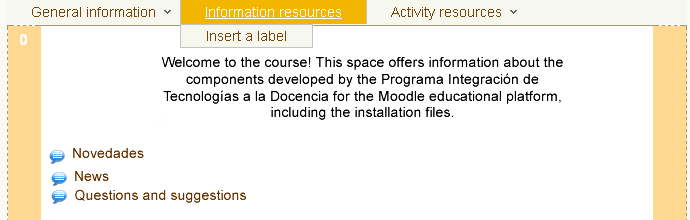
Figure 22. View of the menu
In the figure 23, the topic is displayed with a green color.
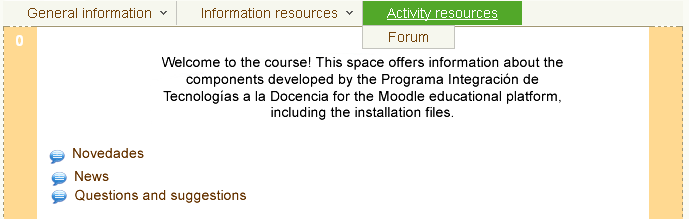
Figure 23. View of the menu